Ola Login/Signup
In order to make an Ola booking through your app, users need to have an Ola account which needs to be connected to their account on your platform. The flow of user login or user signup (in case they do not have an Ola account) is owned by Ola, and you need to open this section as a webview within your app using OAuth URL (Refer Link).
User Flow
-
Step 1: User has to enter mobile number 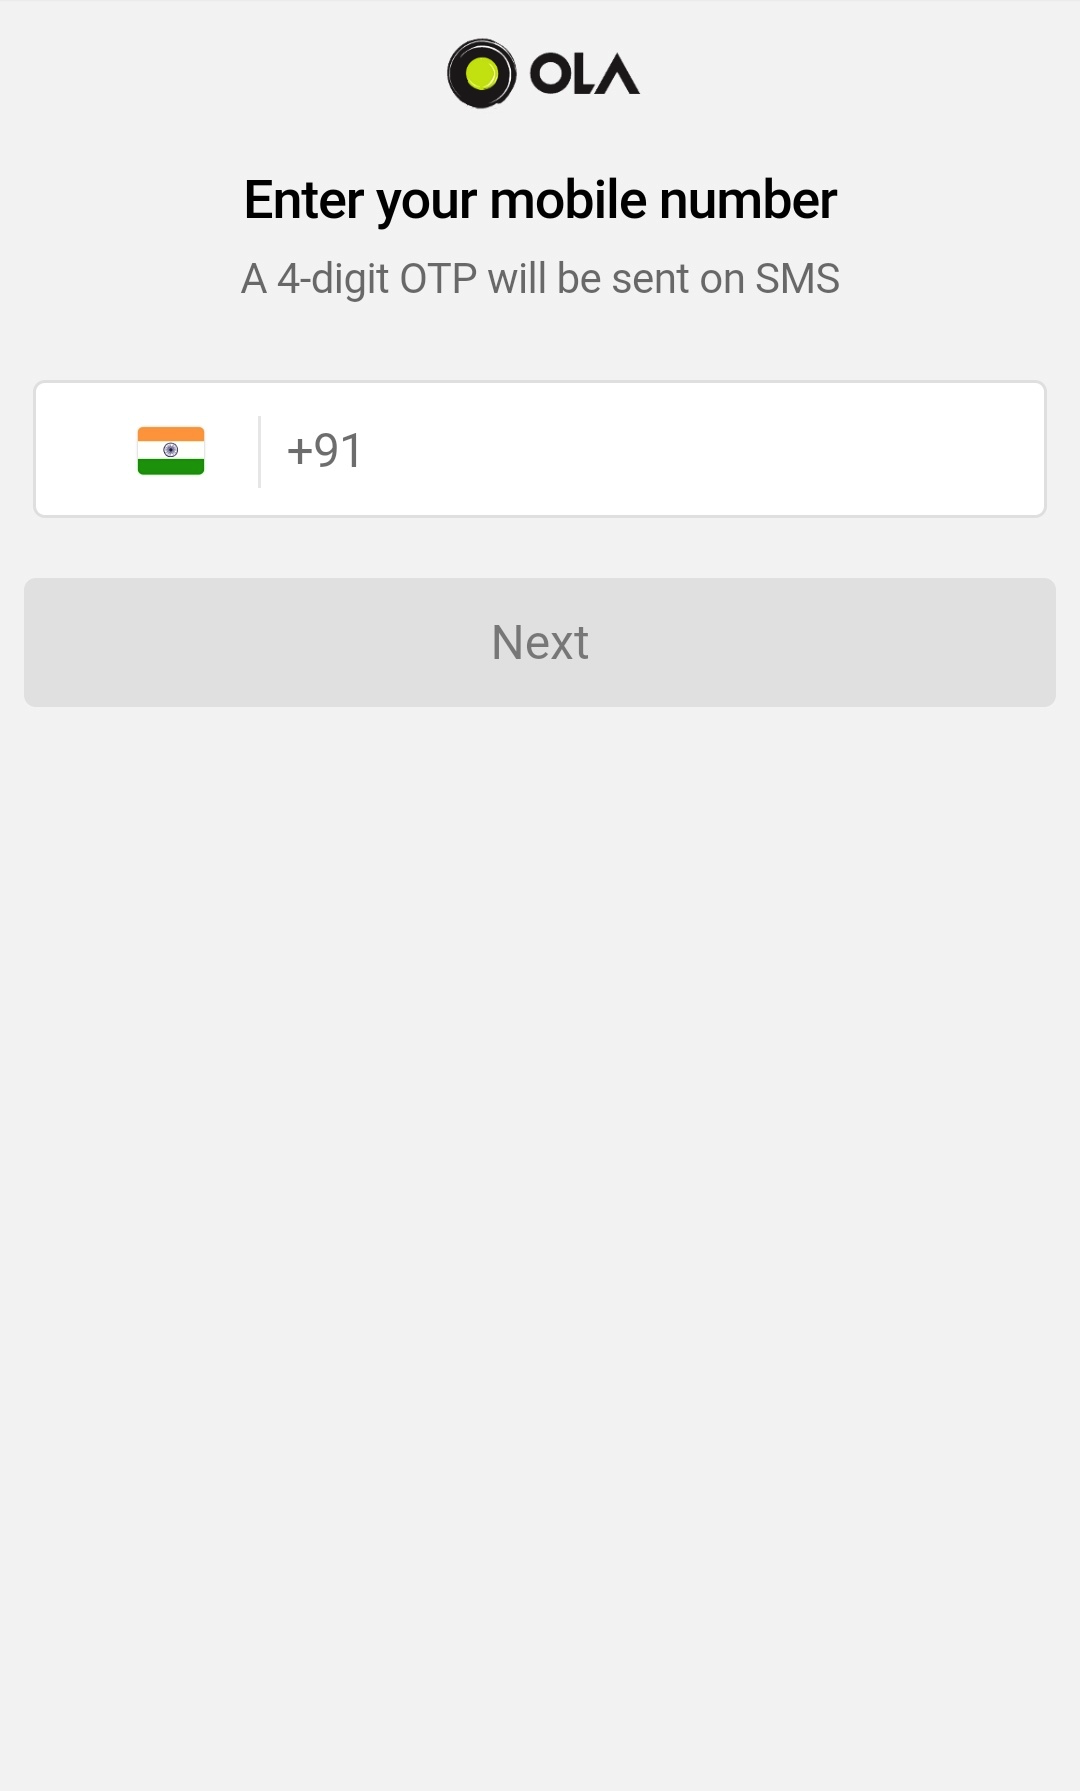
-
Step 2: User has to enter personal details (only in case of new user) 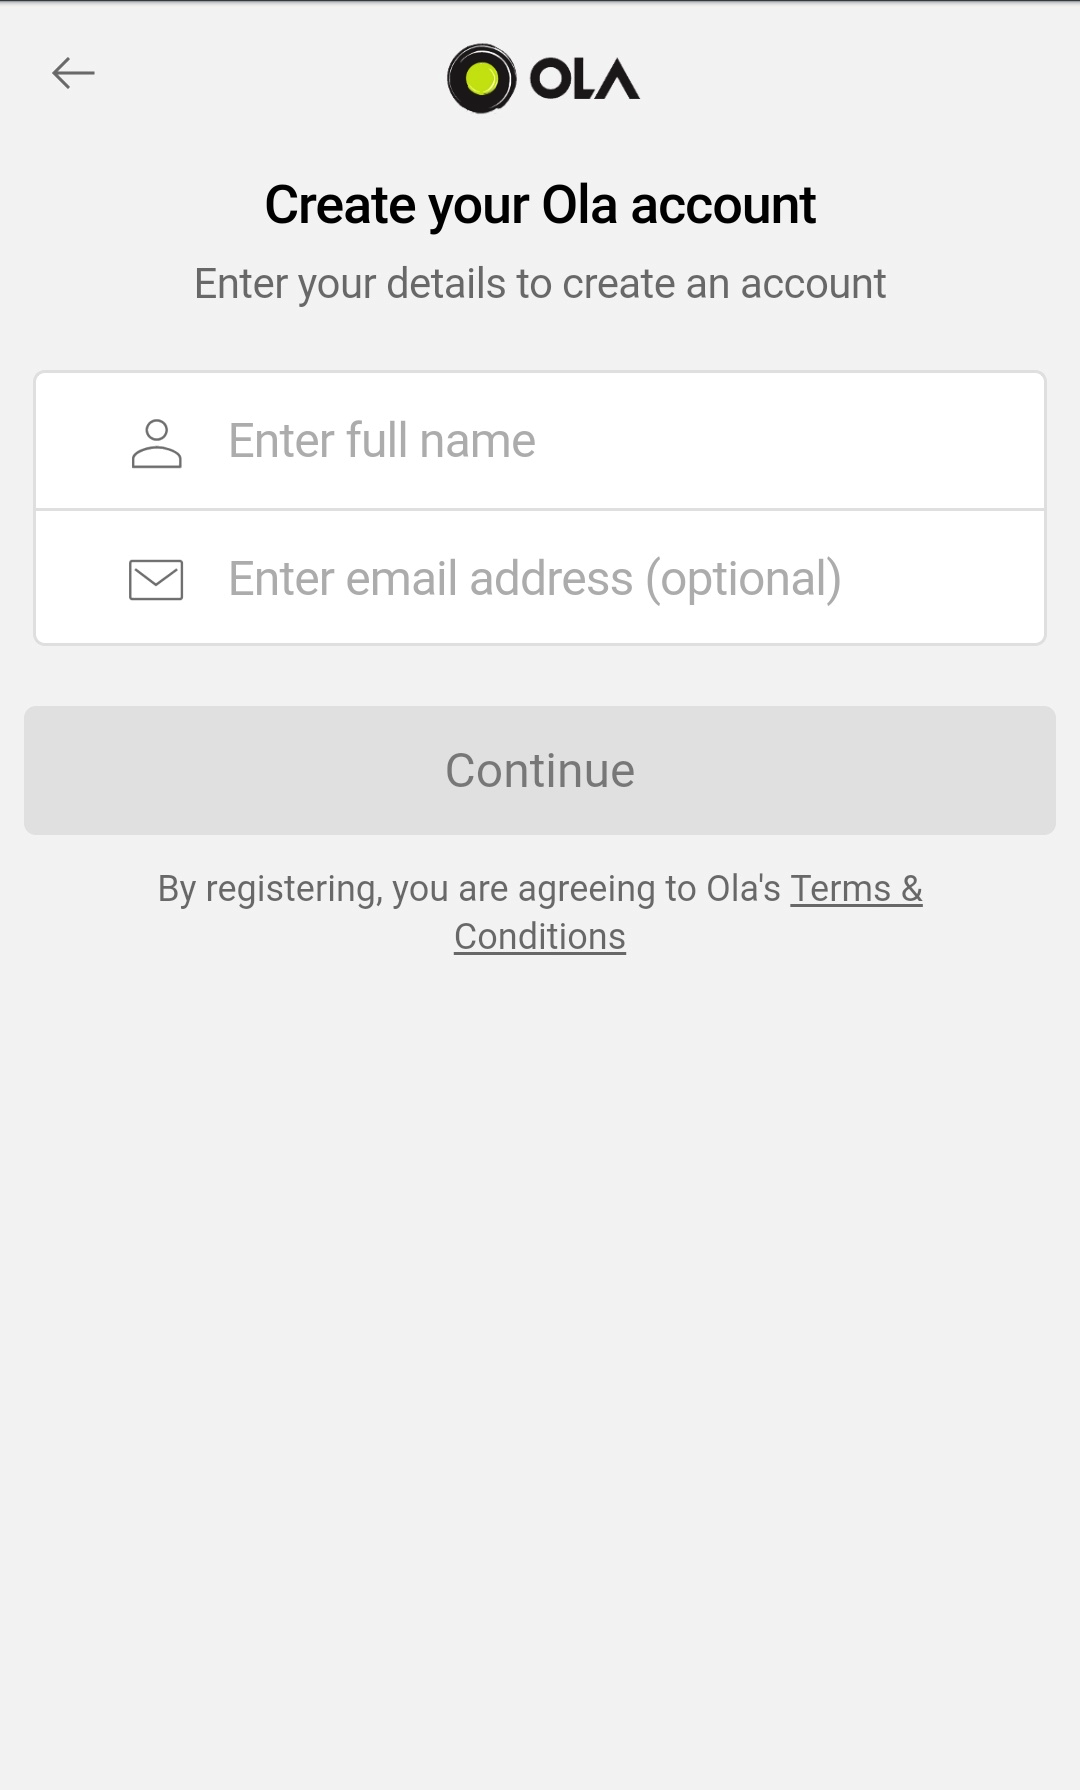
-
Step 3: User has to enter OTP 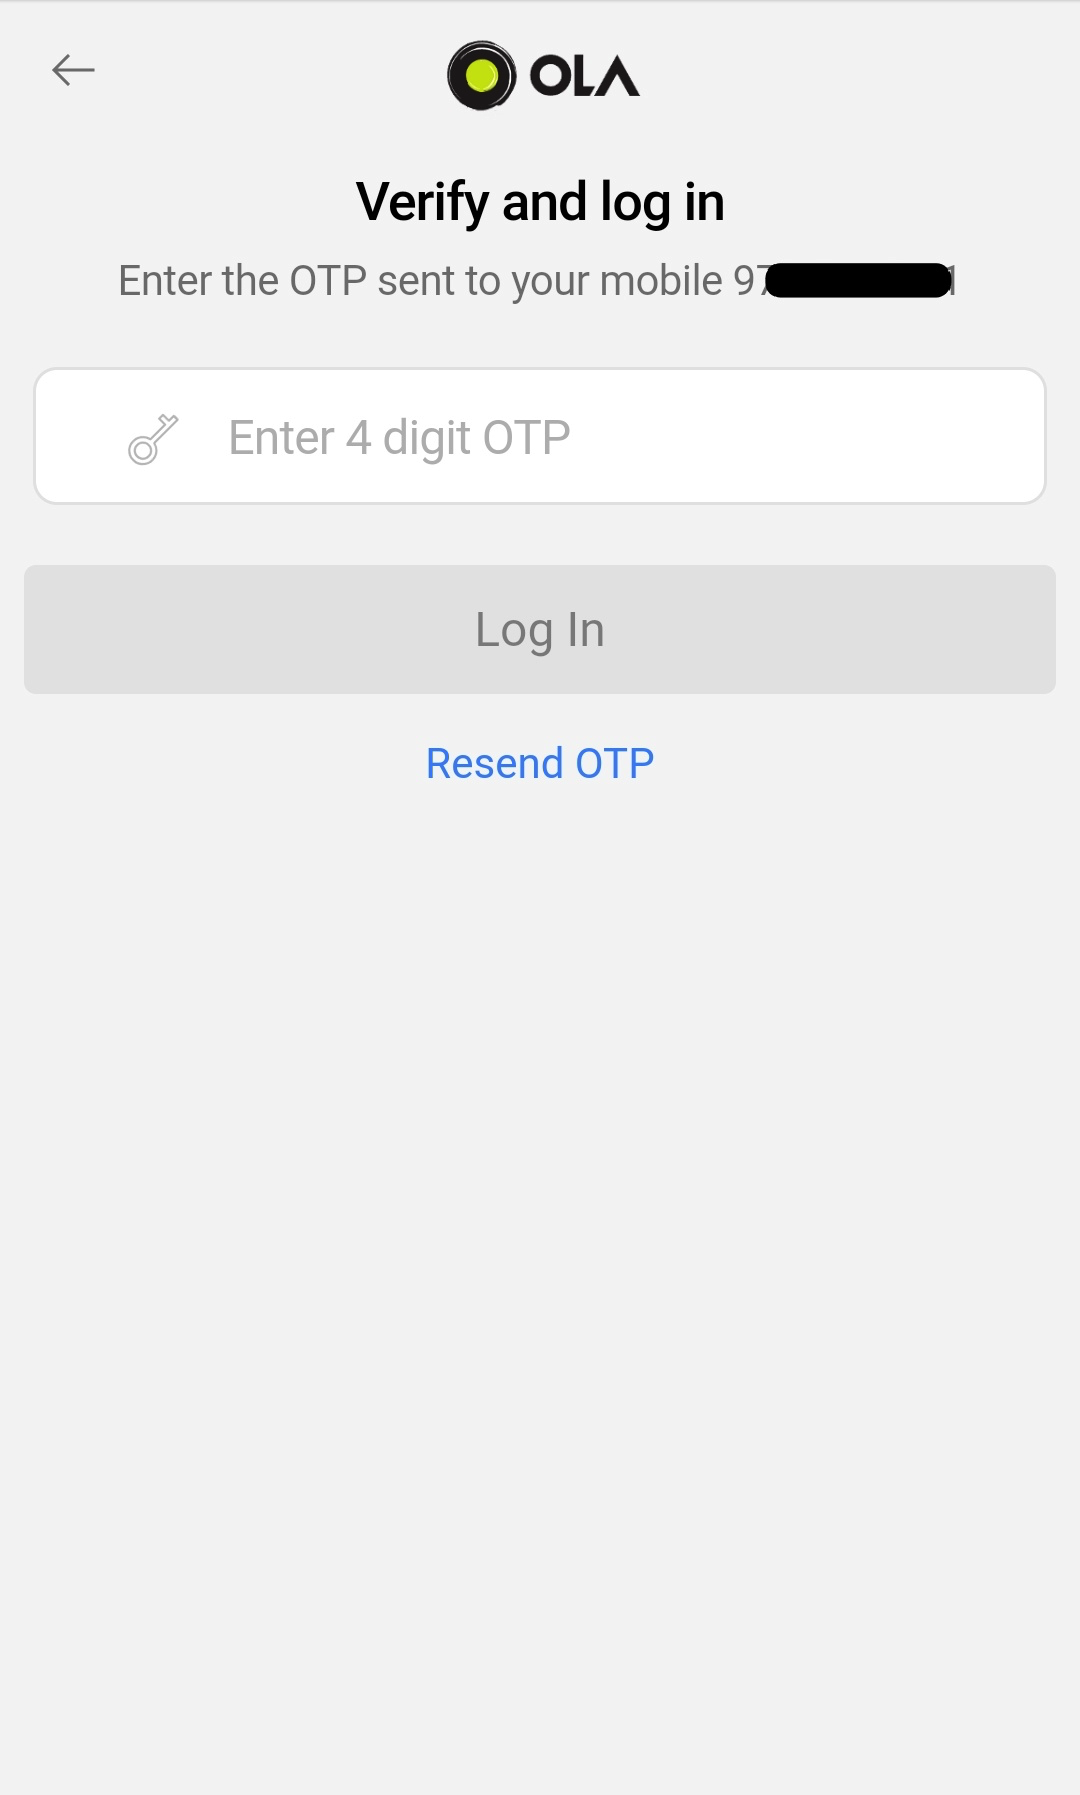
-
Step 4: User has to provide consent 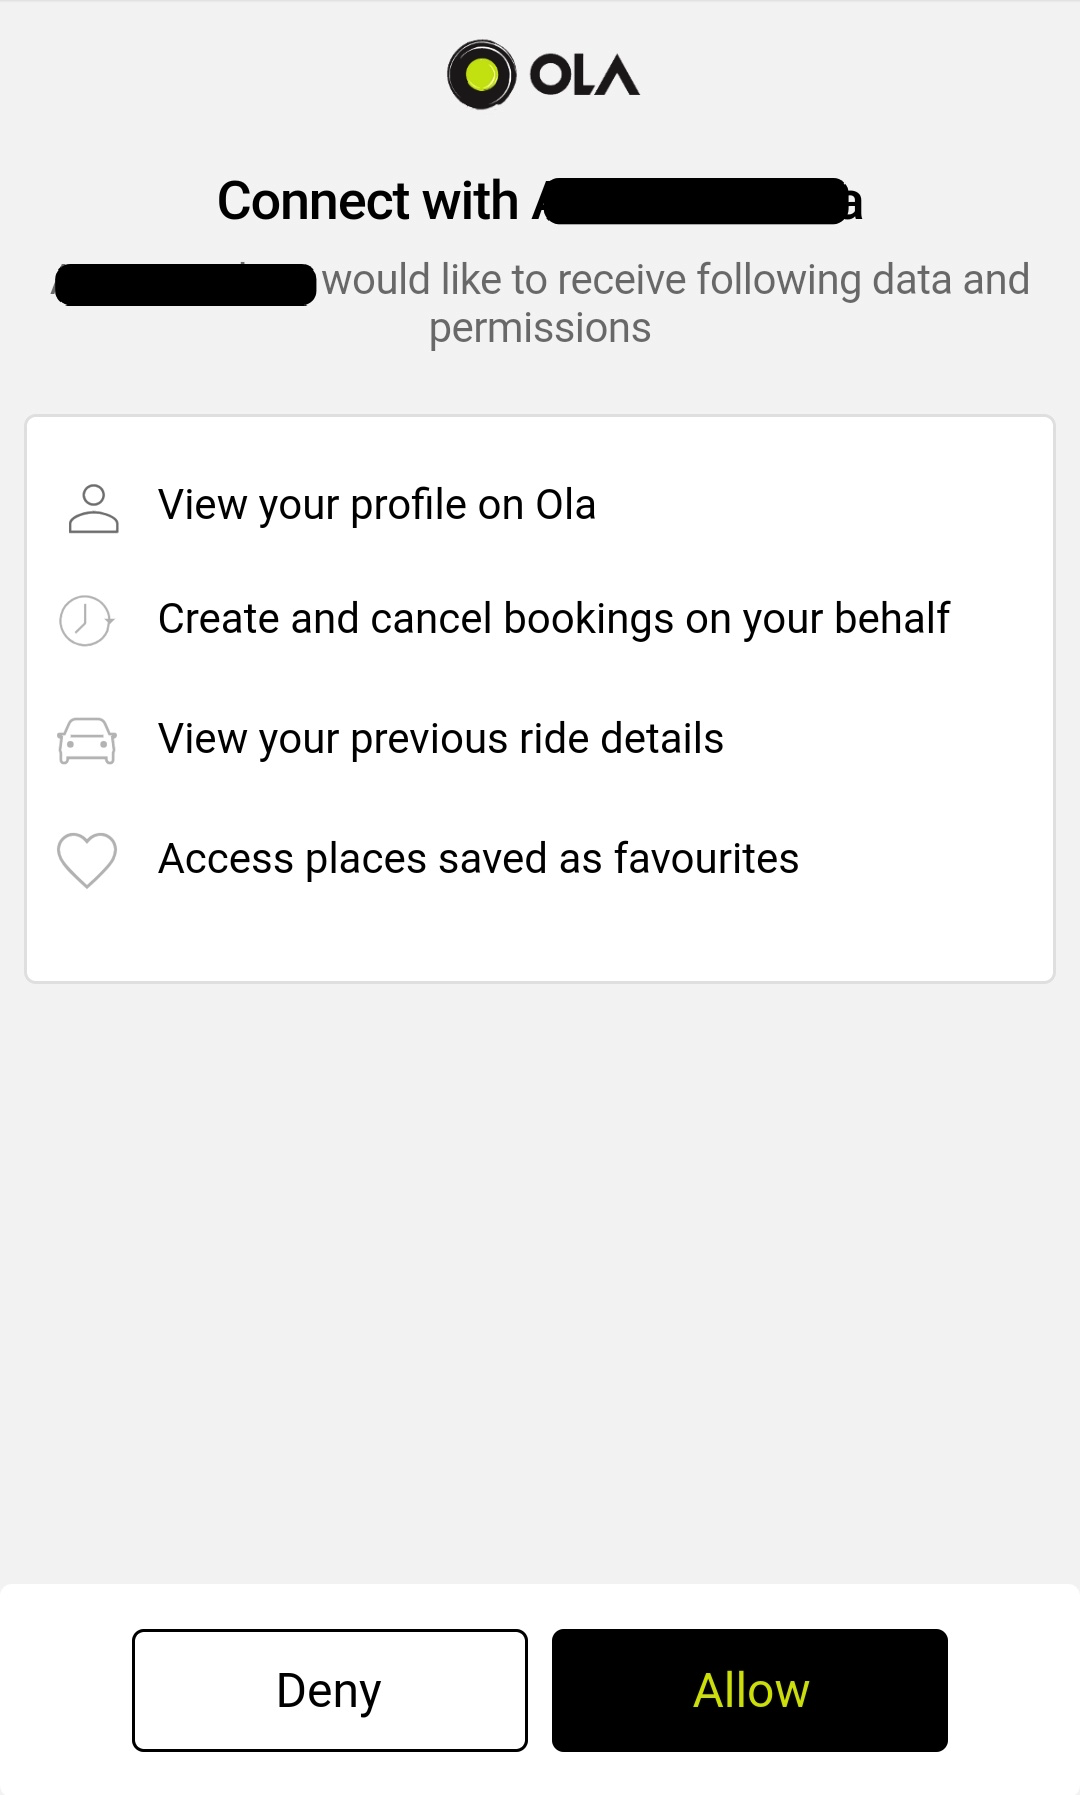
Pre-fill user details and Auto-read OTP
In order to make an Ola booking through your app, users need to have an Ola account which needs to be connected to their account on your platform. The flow of user login or user signup (in case they do not have an Ola account) is owned by Ola, and you need to open this section as a webview within your app using OAuth URL (Refer Link).
-
Pre-fill user details
This needs to be called immediately after launching the webview, to be used in steps 1 and 2. window.populateFields('autoread-userinfo', { "name": "Good Boy", // Name of the user "email": "xyz@gmail.com", // Email ID of the user "phone_number": "7777777777", // 10-digit mobile number of the user "dialing_code": "+91", // Country Code (should always be +91) "app_metadata": { // Will be used for fraud checks "device_id": "", // IMEI number of the user device "ga_id": "", // Google Advertising ID of the user device "android_id": "" // Android ID of the user device } }); -
Auto-read OTP
This needs to be called once SMS is received on user’s device, to be used in step 3. You need to have user permission to access and read SMS. window.populateFields('autoread-otp', { "sender": "ix-olacab", // Sender of the SMS "message": "6443 is your ola OTP to login. [Generated at 14:20:12 IST] Br0tQsjh4iC" // SMS content });